User guide
User guide
Start from a template or a blank email, change it by clicking and dragging right on the email, then download a file that opens in Outlook. This page shows every tool, with a numbered picture for each part of the screen.
Last updated 13 November 2026. Not affiliated with Microsoft.
1. Start an email
Go to Start an email. Pick a template to begin with something finished, or the blank email to build your own. Either way everything can be changed afterwards. Three templates show at first; “View more templates” shows the rest. At the top of that page you can also describe the email in words and let AI build a first draft, when AI is switched on for your account.
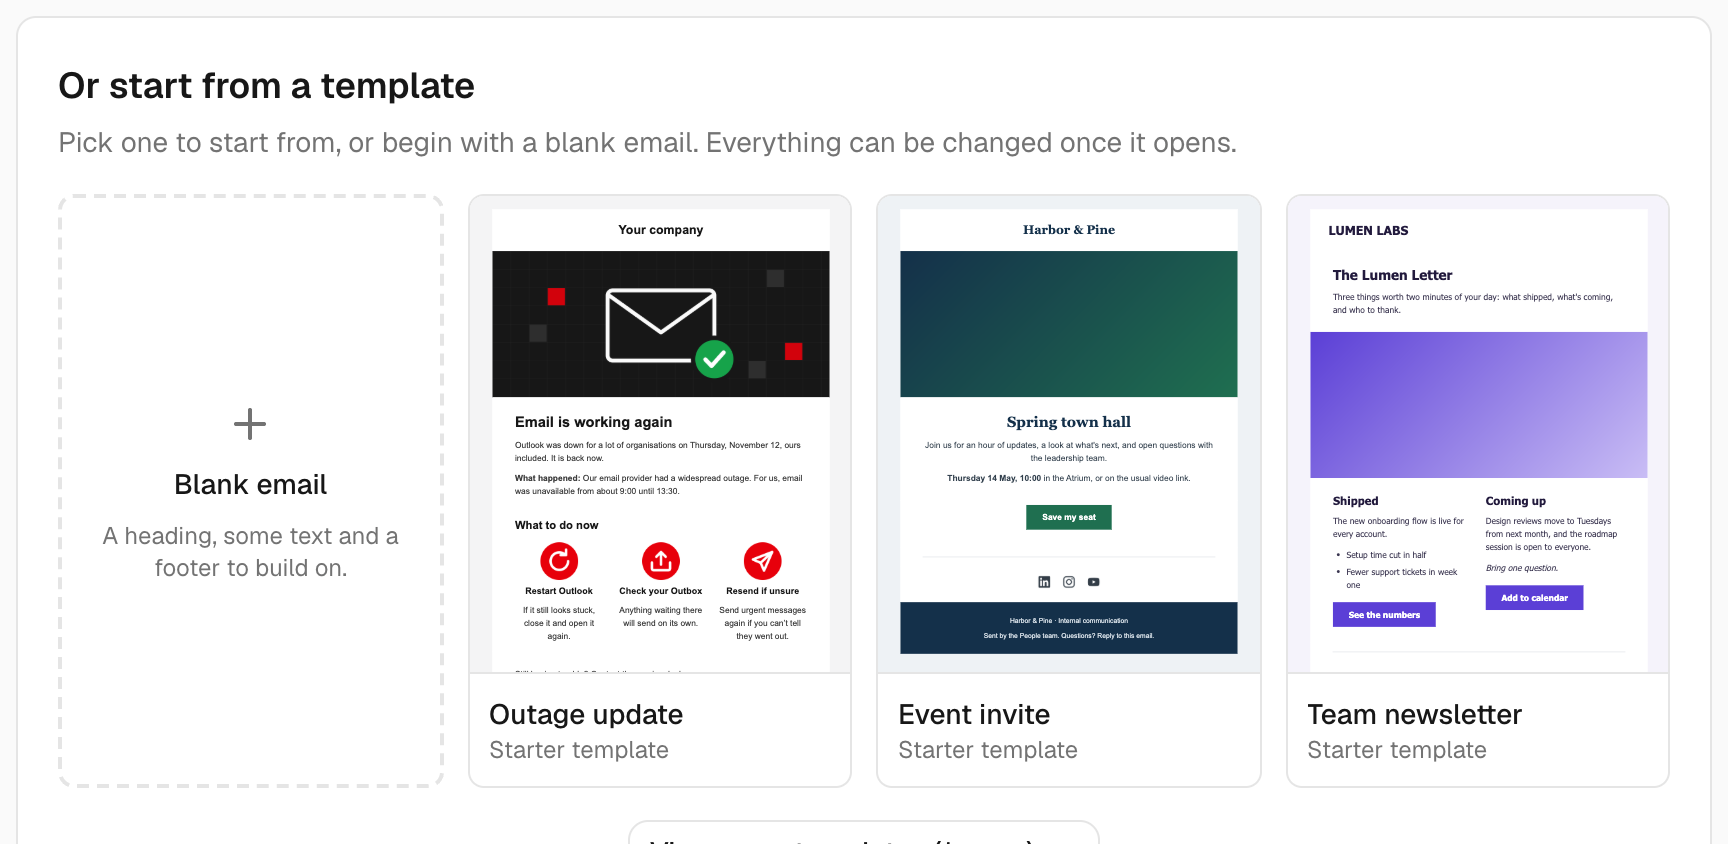
- 1Blank email. A heading, some text and a footer, in a plain black-and-white look.
- 2A template. Click one to open your own copy of it. Templates you save yourself appear first.
2. The editor at a glance
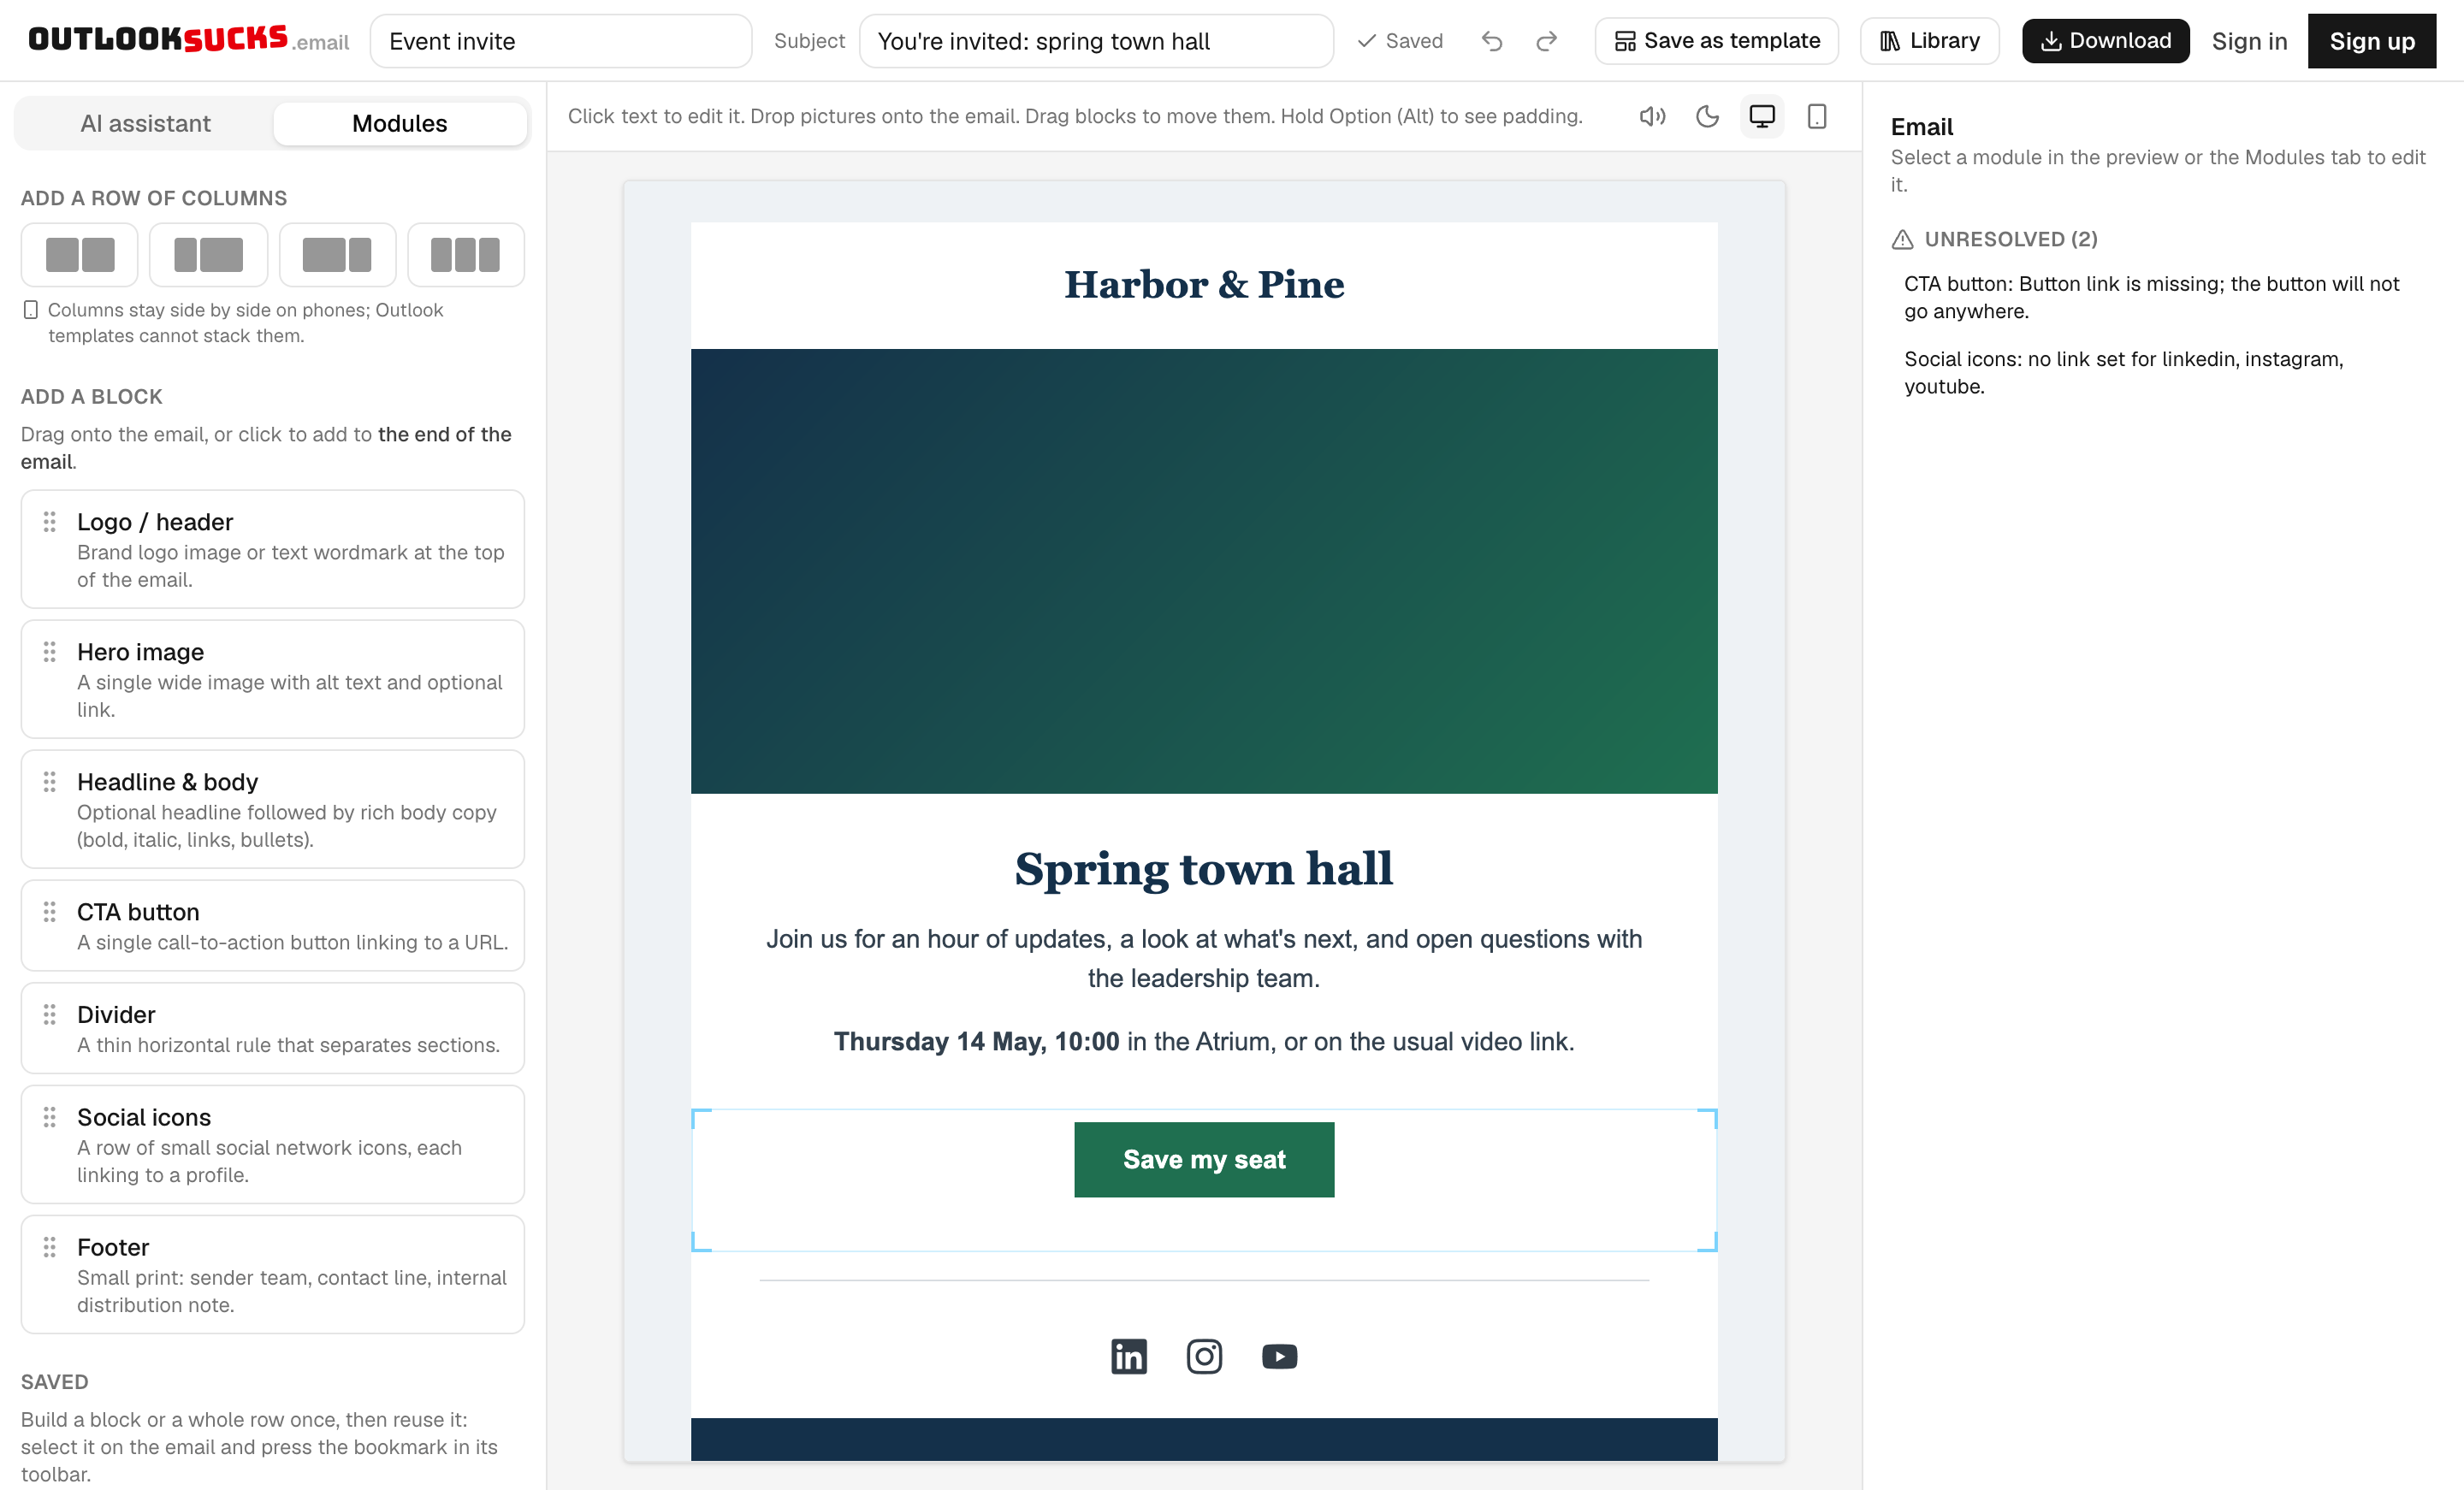
- 1Top bar. Name the email, set its subject, undo, save as a template, open your Library, and download.
- 2Blocks. The building pieces. Drag one onto the email, or click it to add it. Rows of columns are at the top; your saved blocks are at the bottom.
- 3The email. This is what you are making. Click any text to type. Click a block to select it and show its toolbar. Drag a block to move it.
- 4Settings. Everything about the selected block in one list, for when you want exact numbers. It also lists things worth fixing before you send.
3. The toolbar on a block
Click a block and a dark toolbar appears above it. This is the one for a text block, shown while typing. Other blocks have the same toolbar with a few buttons swapped.

- 1Block name. Which kind of block is selected.
- 2Bold, italic, list, link. Select some words first, then click. These show while you are typing in the text.
- 3Text size. Minus makes the text smaller, plus makes it bigger. The number is the size.
- 4Text colour. Pick a colour for the text.
- 5Alignment. Left, centre or right.
- 6Background colour. The colour behind this block.
- 7Space above and below. Minus tightens it, plus adds room. Hold Option (Alt) to see the spacing drawn on the email.
- 8Move up, move down. Shift the block one place. You can also drag it.
- 9Duplicate. Makes a copy right below.
- 10Save for reuse. Keeps this block in your saved blocks, ready to drop into any email.
- 11Delete. Removes the block. Undo brings it back.
4. Pictures
To add a picture, drop a file from your computer onto the email, or add a picture block and click it. Click a picture to get its toolbar. The first button opens the picture menu.
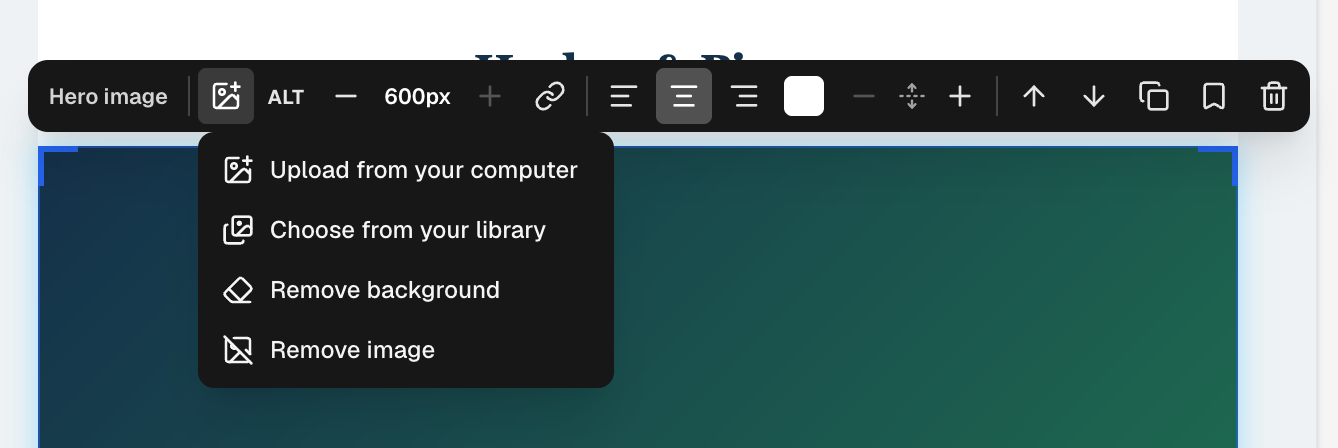
- 1Picture menu. Opens the four choices below.
- 2Description. A few words describing the picture. It shows when pictures are blocked and is read aloud by screen readers.
- 3Picture width. Minus makes it narrower, plus makes it wider.
- 4Link. Make the picture clickable by giving it a web address.
- 5Upload from your computer. Choose a PNG, JPEG or GIF file, up to 5 MB.
- 6Choose from your library. Reuse a picture you have uploaded before.
- 7Remove background. Clears a plain background (such as white behind a logo) so the picture sits cleanly on any colour. Undo brings the original back.
- 8Remove image. Empties the block so you can put a different picture in.
5. Buttons
Click the words on a button to change them. Use the toolbar to say where the button goes.

- 1Button link. The web address the button opens. An amber dot means it has not been set yet.
- 2Background colour. The colour behind the button's row. The button's own colour is in the settings panel on the right.
6. Check how it looks

- 1Sound effects. Turns the small sounds on or off.
- 2Dark mode preview. Shows roughly how the email looks for people who use a dark theme. Your email is not changed. Watch for pictures with a white background.
- 3Desktop width. The normal view.
- 4Phone width. How wide a phone screen is. Outlook emails do not rearrange themselves on phones, so keep columns simple.
7. The top bar

- 1Name. What the email is called in your Library. Only you see it.
- 2Subject. The subject line people see in their inbox.
- 3Saved. Your work saves itself as you go. This tells you when it has.
- 4Undo and redo. Step back or forward through your changes.
- 5Save as template. Keep this email as a starting point for future ones.
- 6Library. Your emails, templates, saved blocks and images.
- 7Download. Get the file to open in Outlook.
8. Download and send
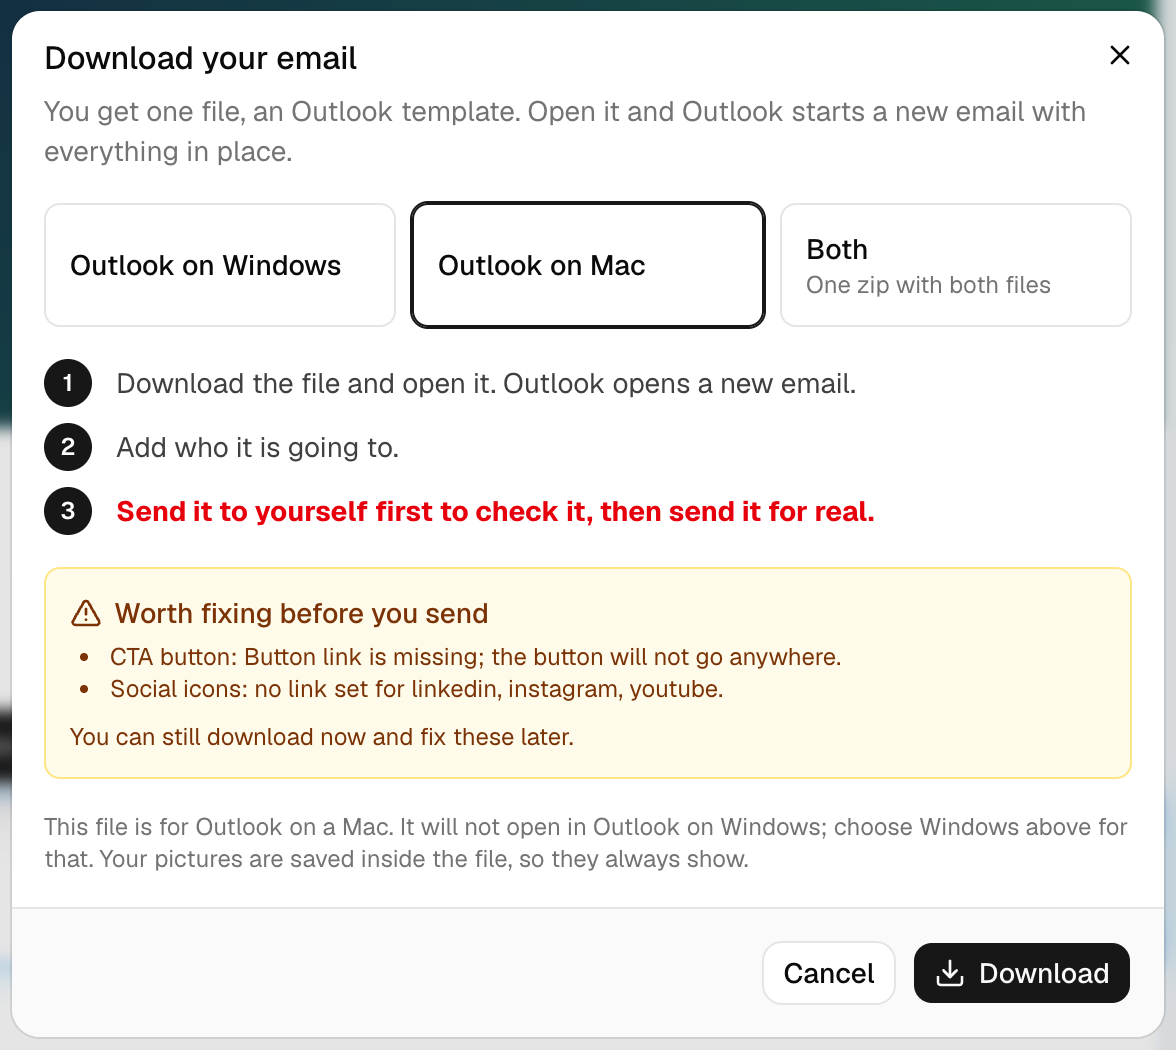
- 1Outlook on Windows. Downloads a file ending in .oft.
- 2Outlook on Mac. Downloads a file ending in .emltpl.
- 3Both. One zip with both files and a short note saying which is which. Handy when you are passing the email on.
- 4Download. Then open the file. Outlook starts a new email with everything in place. Add who it is going to, and send it to yourself first to check it.
More on opening these files in each version of Outlook: How to create an Outlook email template.
9. Your Library
The Library holds everything you have made. Without an account it lives in your browser on this computer. With a free account it is saved online and follows you to any computer.
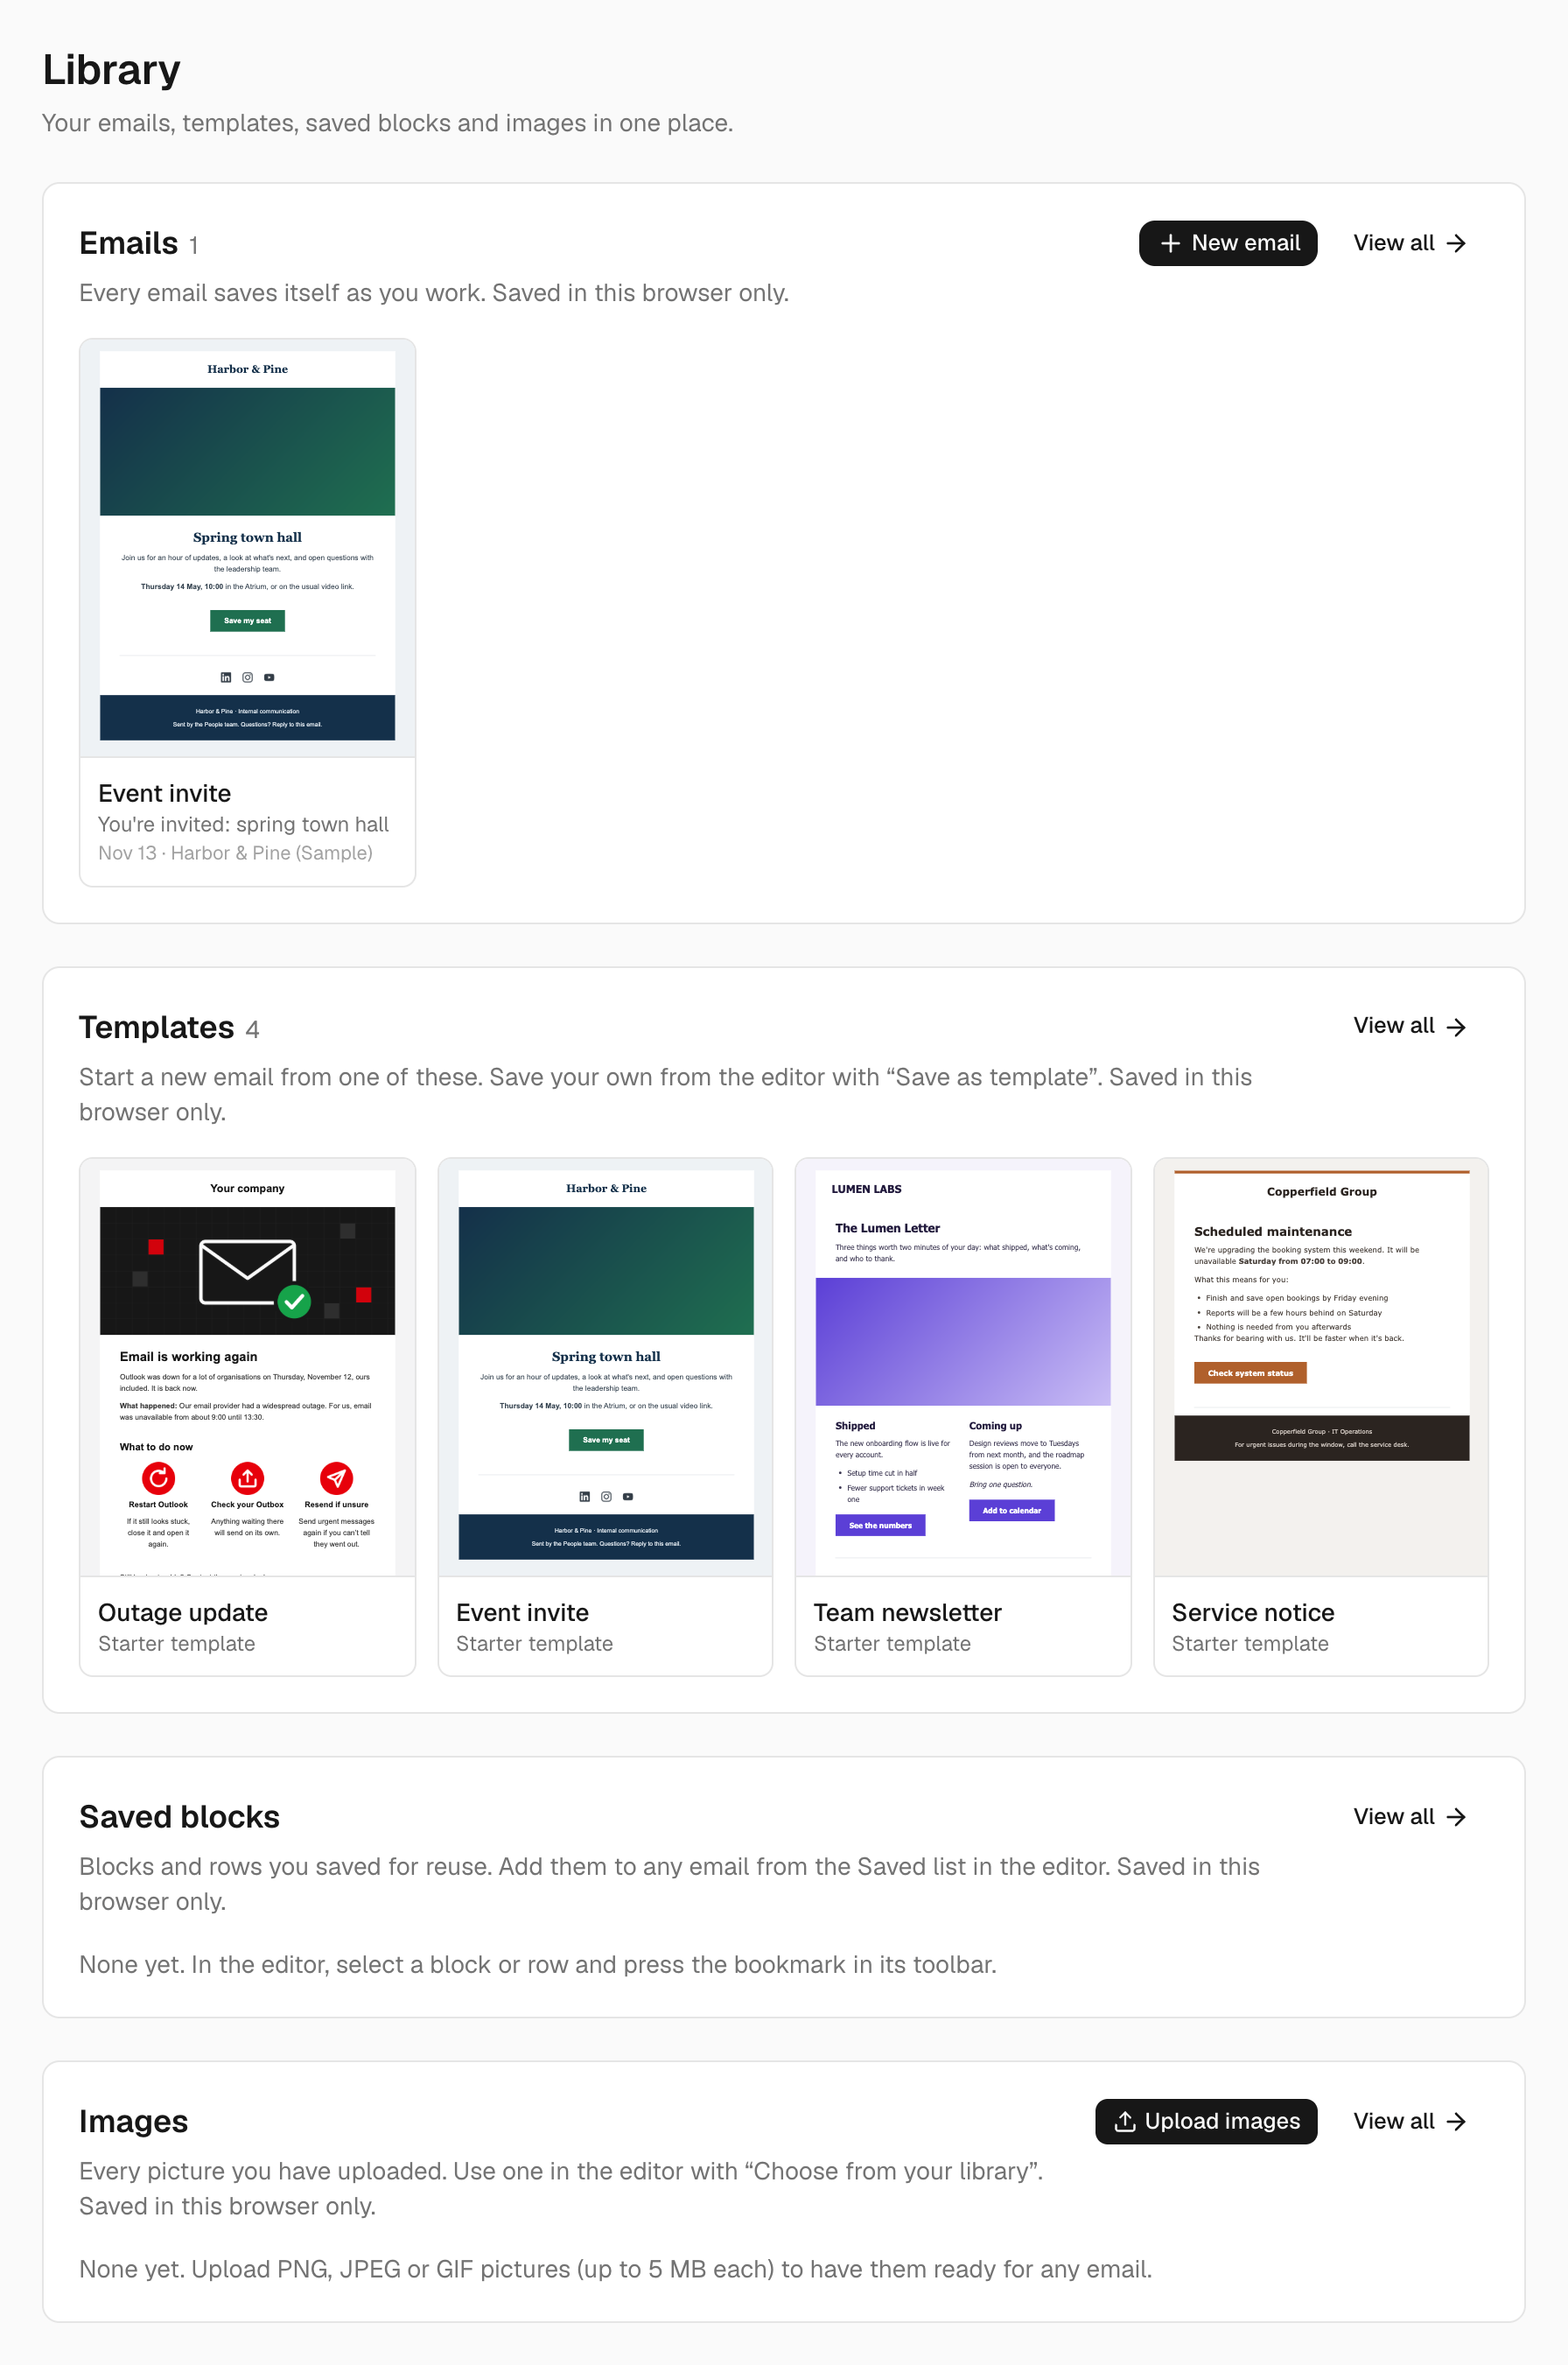
- 1Emails. Every email you have started, with a preview. Click one to carry on.
- 2Templates. Starting points. Click one to begin a new email from it.
- 3Saved blocks. Blocks and rows you saved with the bookmark button.
- 4Images. Every picture you have uploaded. You can upload more here, several at once.
10. Team spaces
A team space is a shared Library for a company or a group. Everyone in it can open, change and reuse the same emails, templates, blocks and images.
- Create one: sign in, open the menu next to your picture at the top right, and choose “Create a team space”.
- Invite people: the same menu, then “Manage team”, then Members. A team space holds up to five people.
- Switch: use that menu to move between “My Library” and your team space. Each keeps its own things.
- Copy between them: in the Library, open Emails, Templates, Saved blocks or Images, point at an item and use the copy button to send a copy to another Library. Its pictures go with it.
- Two people, one email: if a teammate has the same email open, a bar at the top says so. Whoever saves second is asked to reload rather than overwriting the other person, and “Work in a copy” gives you your own version.
Ready to try it?
It is free and you do not need an account. Start from a template and you will have something to send in a few minutes.
Build an email